A couple of decades ago, cars were equipped with standard generators, the armature of which was driven through a pulley and tension belt from the engine crankshaft, and the mechanisms were directly and rigidly connected to each other. The generator overrunning clutch appeared in cars relatively recently, the introduction of this device made it possible to smooth out the transmission of torque from the internal combustion engine, due to which belts began to fail less often in the city, and the service life of the generator bearings also increased.
- 1 Operating principle and benefits of the overrunning clutch
- 2 Tool for removing OMG generator
- 3 Replacing the inertial pulley on a Nissan Primera P12
- 4 Removing the inertial pulley of the Toyota Avensis generator
- 5 Removing and installing an inertial pulley on a Skoda Octavia-2 car
- 6 Signs and causes of inertia pulley malfunction
- 7 Manufacturers of inertial pulleys
Although the innovation brings some benefits, it has its drawbacks. Over time, this unit wears out (on average, the resource is about 100 thousand km), and therefore needs periodic replacement. Repairing the generator overrunning clutch (OMG) itself is quite difficult, since it is considered a non-separable part, although some specialists undertake to repress the bearing. In this article we will look at the principle by which this unit works, how important it is in the vehicle, and how it is removed or replaced.
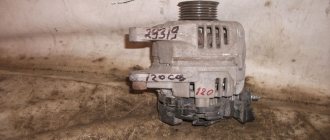
Generator Toyota Corolla, Generator repair
Toyota Corolla cars are equipped with three-phase alternating current generators with electromagnetic excitation, with a built-in rectifier unit and an electronic voltage regulator. The generator shaft is mounted on closed bearings that do not require additional lubrication throughout its service life. The generator shaft is driven into rotation from the crankshaft pulley by a poly V-belt. To reduce belt wear in cases where sudden
When the engine crankshaft speed decreases, the generator rotor rotates by inertia; the generator pulley is equipped with a freewheel that transmits rotation in only one direction.
Recently, many companies have appeared that specialize in the repair of imported generators and starters. There you can diagnose a faulty unit, purchase spare parts for any generator (starter) model, and receive qualified advice. If you are not sure that you can repair the generator (starter) yourself, it makes sense to contact a company where the repair of these components will be carried out quickly, efficiently and, as a rule, at an affordable price. However, on cars with high mileage, it is often more profitable to replace the assembly with a new one than to replace failed parts.
Toyota Corolla alternator replacement
You will need: all the tools for removing the engine mudguards, as well as 10" and 12" wrenches, and a flat-blade screwdriver.
1. Remove the right front wheel
2. Remove the lower and right side engine mudguards
3. Remove the decorative engine cover
4. Remove the front trim of the engine compartment
5. Disconnect the wire from the negative terminal of the battery.
6. Press out the clamp of the prozode harness block.
7. . and disconnect the block from the generator.
8. Press out the fasteners securing the protective cap.
9. . and remove the protective cap of the generator output.
10. Unscrew the nut securing the power cable lug.
eleven. . and disconnect the power cable from the generator.
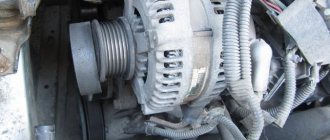
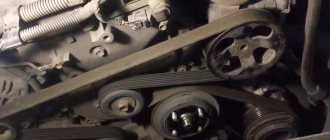
12. Loosen the tension on the accessory drive belt and remove the belt from the generator pulley.
14. . and the lower generator mounting bolts (shown by the arrow) and remove the generator from the car.
15. Install the generator in the reverse order of removal and adjust the tension of the accessory drive belt
Toyota Corolla generator repair
Complete disassembly of the generator is not recommended, so it is better to contact a workshop that specializes in repairing generators. This subsection shows only the replacement of the brush assembly and rectifier unit.
You will need: 10" and 22" wrenches, 10" socket head, Phillips screwdriver, screw puller, hammer, caliper, tester.
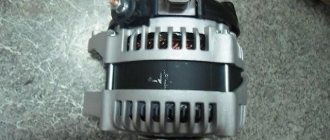
1. Remove the generator from the car
3. . and remove the back cover of the generator.
4. Remove the insulating sleeve of the generator power contact.
5. Check the resistance of the rotor winding by connecting the tester to the slip rings. The resistance should be approximately 2.3-2.7 ohms. If the tester shows infinity, it means there is a break in the windings and the rotor needs to be replaced.
6. Check the diodes of the rectifier unit. Connect one wire to the ground of the rectifier unit, the second to the diode terminal.
7. . and then swap the wires. The diode must pass current only in one direction. If the diode passes current in both directions, it means it is faulty.
8. Check the remaining diodes in the same way.
9. To replace the rectifier unit, remove the five screws and remove the rectifier unit.
10. Remove the two screws securing the brush holder.
12. Check the ease of movement of the brushes in the brush holder and their protrusion when free. If the brushes protrude less than 4.5 mm, replace the brush holder assembly.
13. Check the rotor winding for short to ground. To do this, connect the tester probes to the rotor pole and alternately to the slip rings. The measured resistance must be infinitely large, otherwise replace the rotor.
14. Measure the diameter of the rotor slip rings. If any ring diameter is less than 14 mm, replace the rotor.
15. Reassemble the generator in the reverse order of removal.
Source
Replacing the inertia pulley on a Nissan Primera P12
To replace the overrunning clutch on a Nissan Primera car with a QR 20 (2.0 L) gasoline engine, in any case, you will have to dismantle the generator; it is impossible to get close to the pulley on the spot - the unit is located at the bottom in a hard-to-reach place, covered with other parts.
To remove the pulley, you can use a ready-made device or make it yourself by welding it from rods; you will need a 17 mm hexagon. A homemade key will be preferable, since it is stronger - the coupling is screwed in very tightly, the special key may not hold up and break. It is not always possible to move the OMG from its place, although this is how the instructions are supposed to be dismantled.
To fix the anchor, the generator will have to be disassembled, for this:
- remove the back cover, it is secured with four long bolts and a 12 nut (together with the cover, the stator winding is removed);
- we clamp the rotor shaft in a vice, it should be fixed using spacers so as not to damage the part;
- We take a homemade key and unscrew the coupling itself.
We install a new inertial pulley; it is not necessary to tighten it tightly - during operation it rotates clockwise and will not be able to unscrew itself. You must remember to install a protective cap on top of the coupling; if this is not done, dirt will get here and the OMG will fail prematurely.
Related Posts
Front-wheel drive cars are looking for differences from other types...
Ford Focus 2: wheel bolt pattern
General overview of the Mitsubishi Carisma
Generator overrunning clutch
I'm worried about a certain half-whistle, half-rustling sound on an underheated engine, it sometimes appears or doesn't, I initially noticed it a couple of weeks ago, I reached into that unit and found a leak on the pump, or rather, antifreeze was thrown onto the hood from the inside, I leaked here and there, in short, I replaced the pump, but the pump there was practically no play, but on the overrunning clutch the play seemed strong to me. After replacing the pump, this sound also appeared periodically, I decided it might be the belt, I replaced the belt, but it seemed to appear even more often.
I read it, looked at how to check this clutch, today I took off the belt, the clutch is not jammed, when the impeller is blocked with a screwdriver in one direction, the pulley turns, not easily, but it turns, i.e. not freewheeling, but smoothly without jerking or biting, but the play on this clutch is such that you can even hear a light click from simply rocking it while holding it between your fingers, who the hell knows, maybe this is normal, there’s some type of engagement mechanism, maybe it’s his normal play, and the half-whistle is the brushes or bearings of Gena himself. I also tried to rev the engine up to 5-6 thousand and turned off the ignition, I did not hear any abnormal sounds.
I have never owned a car with an overrunning clutch before, I don’t know how it should work normally.
There is one more thing, since the moment I bought the car I have constantly heard a rather high-pitched sound like “Psh. ps..” looks like a small turbine, I only hear it when, for example, I drive up to a speed bump and the speed drops from 1200 to idle, while I press on the brake, these are different sounds from what I described at the beginning and most likely this the sound of normal operation of the overrunning clutch (from the inertial movement of the rotor) or not quite normal, since I hear it, but already fairly worn out, but not yet jammed. By the way, my wife, for example, does not hear this sound at all, for some reason I decided that this was probably some special sound of the variator, it is slightly similar to the slight buzzing from the variator when reversing, but it is not like that.
While I put the old belt back, I think I can sprinkle powder on it and listen further, the mechanical problem will come out stronger - this is understandable, the question is whether it is possible to operate the car at distances of at least 100-150 km from home.
I would at least like to understand, is it normal that there is play in our overrunning clutch, or if there should be play, it should be minimal?
I have never owned a car with an overrunning clutch before, I don’t know how it should work normally [QUOTE]
If we compare the new clutch and the old one, the new clutch engages smoothly, i.e. as if it doesn’t jam. In my case it was exactly like that. There were extraneous noises and the coolest thing was that due to the non-smooth engagement, the clutch could turn on perfectly smoothly, and sometimes it turned on with an offset, such as an eccentric. The eccentric was minimal, but it was enough to cause some vibration at idle. In general, this is the case) Remove the belt, being careful to fix the rotor, begin to rotate the clutch a couple of turns in the free direction, making sure that the clutch rotates without jerking at idle, and sharply turn it in the opposite direction. If the clutch engages immediately, as if it were locked, then replacement is not far off. And if the clutch engages smoothly, like a tight spring being twisted, then everything is fine. The coupling can be serviced. But for this you need a spare cover/plug for it because no matter how hard you try, the cover cannot be removed from the coupling without damage. The coupling is washed and lubricated. The washing process is tedious, but if you have nothing to do)))
Source
To smooth out inertia
Torque from the engine is transmitted in impulses when combustion occurs in the cylinders, and this, as is known, occurs only once for every two revolutions of the crankshaft. Because of this, the crankshaft rotation speed is not constant. The parts driven by the belt, having untwisted, due to inertia are not able to rotate synchronously with the angular velocity of the crankshaft. That is, the shafts of the driven attachments sometimes lag behind the crankshaft rotation speed, sometimes ahead of it. Let's add here the modes of start and stop, acceleration and braking, and it becomes clear where slipping and jerking occurs, due to which the drive belt stretches, wears out and, finally, breaks completely. Of course, both the timing belt and the timing chain (depending on which drive is used) experience extraneous jerks. True, these drive mechanisms are much stronger and more durable. Still, they are designed to rigidly connect the crankshaft and camshafts of the internal combustion engine. However, the engineers considered that it would not hurt to protect them from extraneous impulses generated by asynchronously rotating shafts (and pulleys) of attachments.
Moreover, over time, cars acquired new additional equipment. It is necessary to take into account that the drive of the new units was entrusted to the generator belt and, in addition, the number of on-board electricity consumers increased, due to which the generator itself had to be increased in size and its armature made more massive. As moments of inertia increased, the service life of the alternator belts decreased. Of course, what was happening did not suit anyone. As a solution to the problem, a unit was developed to increase the durability of the belts.
This unit is called an overrunning clutch, and it is integrated into the generator pulley. The coupling has two races: the outer one is connected to the pulley, the inner one is connected to the generator armature shaft. Between the clips there are several rows of rollers. Some play the role of needle bearings, others, rolling along the profiled part of the surface of the inner race, play the role of a locking device.
The operating principle of the overrunning clutch is the same as that of the Bendix starter. When, during the moments of combustion in the cylinders, the pulley accelerates the generator armature, the locking rollers, rolling to the tops of the protrusions, “close” the outer and inner races of the coupling to each other, the torque is transmitted to the armature. But if there is no combustion and compression occurs in the cylinders, slowing down the rotation of the crankshaft, the inner race of the clutch begins to overtake the outer race, the rollers move into the depressions of the working surface of the inner race, and the races are separated. In this case, the pulley and armature rotate independently of each other, which eliminates the negative influence of the inertia of the armature on the generator belt.
Toyota Corolla alternator pulley replacement
One day I started the car and suddenly the charging indicator came on, turned it off, started it - everything was fine. Well, okay, I think, I went on business. And then one fine morning of one fine day, getting ready to go to work, the charger comes on again, I turn it off and start it two more times - the car needs charging. I open the hood and trunk to measure the voltage on the battery and make sure that there is actually no charging. Just as I approached the trunk, I heard a brief squeal of the belt, yeah... I looked at the dashboard, so I thought the charging indicator had gone out. Therefore, I conclude that the problem is in the generator pulley, namely its overrunning clutch.
How to unscrew the generator pulley nut?
Generator Toyota 27060-62160 (DENSO 101211-9590)
I want to change the bearings and brushes.
The nut is 22, on the axle the wrench is 10.
I tried to unscrew it (a week before, while the spare parts were on the way, it was sour in VD-40), - I bent the knob and the axle began to “collapse” a little.
Can't the thread be left-handed? Are sealants like Loctite used on the assembly line during assembly?
I made a 22 key from an old head, because... You can’t get “inside” the pulley with a simple wrench (I cut off the part with a hexagon at the 22nd head, drilled a hole in the channel for the 10mm head, and welded the 22nd head to the channel) - I didn’t have a 22 “curved” key.
How I twisted it: the 22 nut is “hugged” by the 22 head, welded to the channel, and the 10 head (strict hexagon) passes through the hole in the channel inside the 22 head and “hugges” the axle.
As a result, the knob that held the head at 10 began to bend (he held it with an extension made of a half-inch pipe).
Tomorrow I’ll try to heat it with a blowtorch (“thin” burner, alas, no), overnight I poured orthophosphoric acid into the pulley, after degreasing it and blowing it with air.
I can’t disassemble it from the back cover, I remove the “cover”, which is on three screws, under it there is a diode bridge and a regulator, brushes - I remove all this, unscrew the 4 nuts that hold the case, try to halve it - but I get a gap of a millimeter, and then the halves do not separate; the pulley moves close to the front cover.
Attempts to wedge the halves are useless; they do not separate. To remove the front cover, you need to remove the pulley.
Source
Review of analogues and original components
When selecting a belt for the E150 generator, it is recommended to pay attention to the original products from the company - width=”628″ height=”392″[/img]
Dealer belts have a quality guarantee and are characterized by a long service life, which prevents the possibility of the product breaking when used at high speeds or in case of engine overheating.
| Manufacturer | vendor code | Compatibility by car year | Approximate cost, rub. |
| OEM | 16620-22032 | 2006-2014 | 1650 |
| OEM | 09916-02664 | 2006-2014 | 1660 |
| Novline | 1357022010 | 2008-2015 | 1560 |
| API | 25658528 | 2006-2017 | 1590 |
| TYG | 13506-0D020 | 2006-2018 | 1700 |
| TYG | 13540-0D010 | 2006-2018 | 1690 |
It is necessary to select belts by checking the vehicle VIN code and the spare part number for compatibility. If a non-standard model is installed on a car, it is advisable to choose a new belt of a similar form factor and degree of rupture.
Note! The front surface of the new belt must have a quality guarantee stamp and the name of the manufacturer.
Suspension
Shock absorbers, Shock absorber strut, Shock absorber bump stop, Shock absorber boot, Shock absorber bushing, Rear shock absorbers, Shock absorber support, Support bearing, Front shock absorbers, Shock absorber silent block, Springs, Rear springs, Spring support, Front springs, Suspension arms, Control arm silent block, Rear control arm, Bolt Arm, Upper Arm, Left Arm, Lower Arm, Front Arm, Cross Arm, Right Arm, Trailing Arm, Ball Joint, Hub, Hub Bearing, Hub Nut, Hub Bolt, Rear Hub, Hub Cap, Front Hub, Hub Seal, Stud hubs, Stabilizer, Stabilizer bushings, Stabilizer links, Springs, Spring bolt, Spring bushing, Rear spring, Spring bracket, Spring leaf, Spring pin, Front spring, Spring cushion, Spring silent block, Spring shank, Spring stepladder, Air suspension, Air suspension compressor, Air springs, Air suspension unit, Steering knuckle, Swivel bearing, Trunnion, Kingpin, Rear beam, Beam silent block, Subframe, Subframe silent block, Wheel spacers
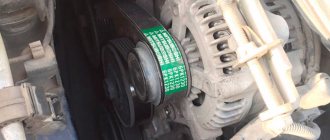
How to replace the drive belt yourself
To install a new belt, you will need a set of wrenches, as well as a wrench and a set of turning attachments.
The whole procedure will take less than an hour and proceeds as follows:
- First you need to remove the protection to gain access to the rotary bolt that regulates the belt tension;
- Next you need to press out the bolt. You should not try to unscrew the part with keys or treat it with special liquids - dismantling will require a wrench or a rough lever;
- After releasing the bolt, the tension of the drive belt decreases, making the product easily accessible;
- The new belt is put on the pulley in the same way as the old one, and the fixing bolt is clamped with a lever.
Note! When installing the drive belt, it is important to pay attention to the location of the hooking elements - if installed incorrectly, the belt may come off or break when the gas pedal is pressed sharply.
If the belt tension is insufficient, the roller rollers will need to be replaced. It is recommended to change the drive belt on the Corolla E150 every 60,000 km, and roller rollers must be replaced every 100-110,000 km.
Repair of generators for Toyota in Moscow
Then the brush holder is replaced.
Generator diagnostics, repair and maintenance. And a lot more useful information
Using the original markings below, you can select the part.
Toyota Corolla owner's story (/) - electrical and electronics. I've been driving a Corolla for 10 years and...
The bolt is pressed out and the old belt is removed.
The algorithm for supplying current from the source to the battery is broken. After installation, the belt should be tensioned to the required tension, checking this parameter with special devices. Then the brush holder is replaced.
This indicates that the belt has become loose and needs to be tightened, or the reason is in the unit itself, worn brushes need to be replaced, there is a breakdown in the winding, the diode kit needs to be replaced. Power is not supplied to the battery, the cause may be an oxidized terminal, a loose belt, or a non-working battery.
Engine
Cylinder head, Valve, Valve springs, Valve rocker (rocker arm), Valve retainer, Intake valve, Exhaust valve, Hydraulic lifters, Valve seals, Valve lifter, Valve cover, Oil filler cap, Valve cover gasket, Cylinder head gasket, Camshaft, Camshaft oil seal , Camshaft gear, Intermediate shaft, Cylinder head bolt, Valve guide, Vtec valve, Vtec valve gasket, Oil pipe, Cylinder block, Crankshaft, Crankshaft pulley, Pulley bolt, Crankshaft bolt, Main bearings, Crankshaft cover (yoke), Oil deflector, Half rings , Crankshaft oil seal, Crankshaft hub, Crankshaft gear, Piston, Piston rings, Piston pin, Connecting rod, Connecting rod bolt, Connecting rod bearings, Connecting rod bushing, Engine sump, Pan gasket, Drain plug, Cylinder liner, Oil pump, Oil pump chain, Oil gasket pump, Oil receiver, Oil separator, Oil nozzle, Balance shaft, Filter housing, Engine cover, Engine timing belt, Timing belt, Timing kit, Timing belt roller, Timing tensioner, Timing tensioner roller, Timing chain, Chain kit, Chain tensioner, Chain tensioner , Phase adjuster, Timing gear, Timing belt cover, Timing cover gasket, Engine mount, Engine bracket, Engine bump stop, Engine mount (support), Engine assembly, Engine gaskets, Engine sensors, Engine oil cooler, Oil filter mount, Oil filter gasket , Engine cover, Engine protection, Engine pipe, Oil dipstick
Everything you need to know
The generator operates immediately after the car engine starts and continues until the ignition is turned off.
The generator performs a lot of functions:
- Recharges the battery;
- Provides engine ignition;
- Supplies voltage to additional electrical consumers in the car.
The principle of operation of the generator on the Toyota Corolla E150 is electromagnetic induction, as a result of which a magnetic flux passes through the copper winding of an electric coil and generates voltage. The output voltage synthesis is directly proportional to the rotation speed of the equipment.
Despite the average engine power, the generator on the E150 is installed with a reserve, making it possible to connect additional consumers with increased load: when installing additional acoustics, multimedia or a new air conditioner, replacing the generator is not required.
| Manufacturer | vendor code | Equipment power, ss | Compatibility by year of manufacture | Approximate cost, rub. |
| Dingo | 157QMJ | 125-135 | 2006-2009 | 17900 |
| Unipoint | ALTT150 | 125-140 | 2007-2010 | 18300 |
| DINGO | 152QMI | 125-140 | 2006-2018 | 18000 |
| DINGO | 157QMJ | 150-180 | 2006-2018 | 19900 |
| 4T | 147FMH | 150-180 | 2006-2017 | 21000 |
| 4T | 152FMI | 150-180 | 2006-2017 | 20700 |
Note! You must select a new generator for the E150 strictly according to the vehicle’s VIN number or by ordering components on the manufacturer’s official website using original part numbers. These methods will protect you from purchasing an incompatible device model - an incorrectly selected generator can cause failure of all electrical equipment of the vehicle.
Related products:
The battery is being recharged - the cause could be any of the faulty elements of the mechanism. The appearance of a characteristic whistle in the area where the generator is located most often occurs due to a high degree of belt tension and a high load on the bearing. Any repairs or replacements must be carried out only after the vehicle has been completely de-energized and all terminals from the battery have been disconnected. Features of repair and replacement In situations where it is not possible to repair the device, it is replaced.
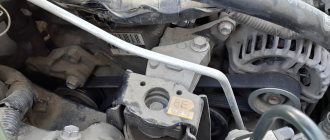
OMG generator removal tool
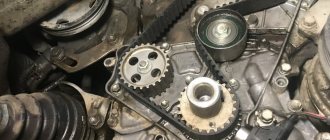
Externally, the generator unit itself with an overrunning clutch is practically no different from a conventional generator; you can only notice the difference if you carefully look at the pulley (front part):
- with a standard power source, the armature shaft is “recessed” relatively shallowly, the pulley is screwed to it with a standard nut;
- The fastening element of the generator with the coupling is quite difficult to discern, and it always has a countersunk head, and is also closed with a protective cap. Having removed this protection, you can see that underneath there are internal slots for installing a key.
Working principle and benefits of overrunning clutch
The generator, which is the source of electricity, is driven by an internal combustion engine, but since the engine operates at different speeds, its torque is constantly changing. The generator armature (rotor), driven by the internal combustion engine, rotates by inertia and when changing mode continues to rotate in the same rhythm, therefore the load on the belt at these moments increases significantly.
An overrunning clutch (another name is an inertia pulley) is designed to smooth out differences in torque; this mechanism works on the Bendix principle in a starter. When the engine picks up speed, the parts of the overrunning clutch are engaged with each other, providing a rigid connection and maximum transmission of motion. When you release the gas pedal, the OMG parts are disconnected from each other, the rotor continues to rotate by inertia, regardless of the engine. Thus, inertial dependence is eliminated; the belt and bearings of the generator are no longer loaded to the limit, so their service life increases significantly.
At first, inertial pulleys were installed only on diesel engines, but later they also appeared on premium cars with powerful gasoline engines. Now such devices can be found on many car models, for example, Ford Transit or Ssang Yong Chiron with diesel engines, and are no longer uncommon.
Toyota Corolla E150 generator replacement and repair
The process of replacing a generator with your own hands is quite extensive, but will not cause difficulties. To repair equipment, you will need a slotted screwdriver, a set of wrenches, pliers and electrical tape.
The procedure for replacing or restoring the functionality of the generator will take approximately 2-2.5 hours and can be performed with one pair of hands. To repair a generator on a Toyota Corolla E150 you must:
- Place the hood on the stop and turn off the power supply to the car by disconnecting the negative terminal from the battery;
- Next, you need to jack up the front of the car and remove the right front wheel, as well as remove the mudguards;
- Then we remove the decorative engine casing and its lining, after which access to the generator opens;
- Near the device, disconnect the electrical connector and remove the cover. To do this, you need to loosen the wiring harness with pliers, and after disconnecting the latch, disconnect the power wire;
- Now we loosen the drive belt to the required level and remove the product from the pulley;
- Next, all that remains is to unscrew the fixing screws on the mounting brackets and the equipment can be removed.
The dismantling procedure ends here: if it is not repairable, the generator must be replaced with a new model and the equipment must be installed according to this algorithm in reverse order.
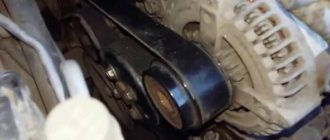
Removing and installing an inertial pulley on a Skoda Octavia-2 car
On the Octavia, the overrunning clutch can be replaced on site without removing the generator unit; the free space in front allows you to get to the desired mechanism. We perform the operation in the following order:
- turn off the ignition, for safety reasons, disconnect the battery ground terminal;
- remove the absorber tank together with the hose; first of all, disconnect the pipe fitting;
- lift the tank upwards, then remove the generator belt; to do this, loosen the 17 mm nut on the tension roller;
- the special device for removing the pulley has a fairly long rod and is installed in the splines with a bias, so it is better to modernize the key - replace it with a hex bit;
- Having secured the device to the pulley, we try to unscrew the coupling.
When the OMG is screwed very tightly, you have to remove and disassemble the generator, clamp it in a vice, there is no other way out. Installation of the coupling is carried out in the reverse order; it is not necessary to tighten it very tightly. You also need to remember to put on a protective cap; if this is not done, moisture and dirt will get inside the mechanism, the parts will quickly rust and fail.