Toyota Sprinter
was produced with various body options, such as Toyota Sprinter Trueno (three-door coupe), Toyota Sprinter Cielo five-door liftback), Toyota
Sprinter Carib (station wagon), Toyota Sprinter Marino (five-door hardtop) and others. Also known as Geo Prizm or Chevrolet Prizm. In this article we will show a description of fuses and relays Toyota Sprinter 1987, 1988, 1989, 1990, 1991, 1992, 1993, 1994, 1995, 1996, 1997, 1998, 1999, 2000, 2001 with block diagrams and their locations. Let's highlight the cigarette lighter fuse.
The location of the blocks and their purpose may differ from those presented and depend on the year of manufacture, level of equipment and region of delivery of your car. Check the purpose with your diagrams on the block cover.
Block in the cabin
Option 1
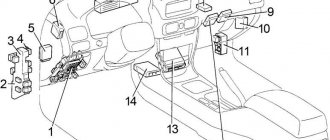
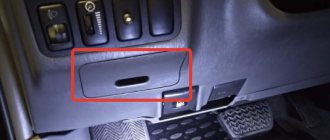
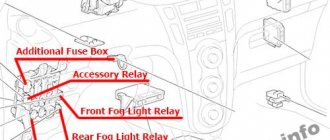
This scheme is suitable for models in the 90, 91 - 95 body. The unit is located under the panel on the rack behind the protective cover.
Diagram from the block cover. Option 1.
Diagram from the block cover. Option 2.
general description
- ECU-IG - electronic fuel injection system, cabin air cooling system
- STOP - stop light
- RADIO - radio, electric rear view mirror
- ECU-B - rear fog lamp
- ENGINE - battery charging system, engine heating system
- WIPER - glass and headlight cleaners and washers
- CIG - cigarette lighter , digital clock display
- IGN - battery charging system, charging indicator light, exhaust gas recirculation device, electric fan in the engine compartment, engine preheating
- TAIL - dimensions, license plate light, instrument panel lighting
- GAUGE - indicator devices, control, signal lights, driving efficiency monitoring device, reversing headlight, air conditioning control system, heated rear window, electric window, central locking
- TURN - flashing direction indicators, hazard warning lights
- SUNROOF - power retractable roof.
The cigarette lighter fuse is designated CIG.
Option 2
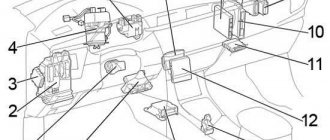
This scheme is suitable for models in 100, 101 bodies. As in the previous version, the unit is installed under the panel on a rack, near the driver’s foot.
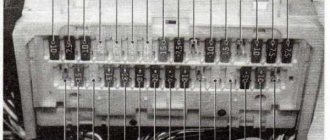
Example block
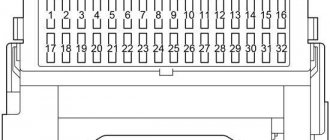
Diagram
Assignment of fuses
Right hand drive
| 1 | 15A FOG - fog lights |
| 2 | 10A IGN - ignition |
| 3 | 15A STOP - brake lights |
| 4 | 30A DEFOG - glass heater |
| 5 | 20A CIG & RADIO - cigarette lighter, radio, mirrors |
| 6 | 10A ECU-B - ABS, power supply for central locking |
| 7 | 10A TURN - direction indicators |
| 8 | 10A GAUGE - devices |
| 9 | 15A TAIL - dimensions |
| 10 | 7.5A DEF-I/UP - increasing idle speed when the glass defroster is turned on |
| 11 | 15A ECU-IG - transmission electronics, ABS, control system lock (automatic transmission) |
| 12 | 20A WIPER - windshield wipers |
Left hand drive
| 1 | 15A FOG - fog lights |
| 2 | 10A IGN - ignition |
| 3 | 15A STOP - brake lights |
| 4 | 20A SEAT HTR - seat heater |
| 5 | 20A CIG & RADIO - cigarette lighter, radio, mirrors |
| 6 | 10A ECU-B - ABS, power supply for central locking |
| 7 | 10A TURN - direction indicators |
| 8 | 10A GAUGE - devices |
| 9 | 10/15A TAIL - dimensions |
| 10 | 7.5A DEF-I/UP - increasing idle speed when the glass defroster is turned on |
| 11 | 15A ECU-IG - transmission electronics, ABS, control system lock (automatic transmission) |
| 12 | 20A WIPER - windshield wipers |
Fuse number 5 at 20A is responsible for the cigarette lighter.
Relay designation
- a — POWER — glass lifts, sunroof and central locking
- b — FOG — fog lights
- c - FLASHER - relay - breaker
- A - DEFOG - glass heater
- B - TAIL - dimensions
Option 3
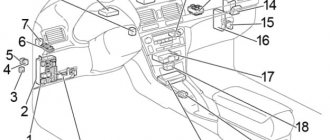
This scheme is suitable for models in the 110, 111 body. In this version, the fuse box is located at the bottom of the instrument panel.
Photo - example
Scheme
Description
| 1 | 15A FOG - Fog lights |
| 2 | 15A STOP - Brake lights, fuel injection system, anti-lock brake system, shift lock system |
| 3 | 10A ECU -IG - Anti-lock braking system |
| 4 | 5A STARTER - Starter |
| 5 | 15A LIGHTER - Cigarette lighter , clock, electric mirrors, radio |
| 6 | 5A ECU -B - Electronic diesel engine control system |
| 7 | 10A METER — Instrument cluster |
| 8 | 7.5A TURN - Direction indicators, hazard warning lights |
| 9 | 7.5A IGNITION - Battery charging system, fuel injection system |
| 10 | 15A TAIL - Tail lights, tail lights, license plate lights, instrument clusters and audio systems |
| 11 | 20A WIPER - Windshield wipers and washer |
| 12 | 30A DEFOG - Rear window heater |
| 13 | 10A IDLE-UP - System for increasing idle speed |
| 14 | 30A DOOR - Central locking |
Fuse number 5 at 15A is responsible for the cigarette lighter.
Description of fuses: location, diagrams, price
Fuse installation diagram
| Markings/designations | What he is responsible for (with description) |
| F (F-1) / 20 | Speedometer, tachometer, gauges |
| F (F-2) / 5 | Reservation |
| F (F-3) / 10 | Reservation |
| F (F-4) / 10 | Reservation |
| F (F-5) / 20 | Car horn |
| F (F-6) / 30 | central locking |
| F (F-7) / 30 | Reservation |
| F (F-8) / 20 | Electrical power system |
| F (F-9) / 10 | Windshield wipers |
| F (F-10) / 10 | Headlight washers |
| F (F-11) / 10 | Rear window washer |
| F (F-12) / 10 | Fuel equipment (optional) |
| F (F-13) / 30 | Automatic transmission controller |
| F (F-14) / 30 | Oven heater, cigarette lighter, interior lighting |
| F (F-15) / 10 | Car socket |
| F (F-16) / 15 | Additional electrical network |
| F (F-17) / 15 | Hazard warning lights, turn signals |
| F (F-18) / 20 | Reservation |
| F (F-19) / 20 | Heated rear window |
| F (F-20) / 20 | Oxygen sensor |
| F (F-21) / 20 | Reservation |
| F (F-22) / 20 | Window lifters |
| F (F-23) / 20 | Exchange rate stabilization system |
| F (F-24) / 20 | ABS |
| F (F-25) / 15 | Reservation |
| F (F-26) / 15 | Reservation |
| F (F-27) / 20 | Glove compartment lighting |
| F (F-28) / 15 | Heater fan (stove) |
| F (F-29) / 15 | Air conditioning system |
| F (F-30) / 20 | Fuel system, fuel pump relay |
| F (F-31) / 15 | Safety system |
| F (F-32) / 20 | Reservation |
| F (F-33) / 20 | Powertrain sensor |
| F (F-34) / 20 | Side mirrors |
| F (F-35) / 20 | Stop signals |
| F (F-36) / 20 | Reserved |
| F (F-37) / 20 | Reserved |
| F (F-38) / 20 | Reserved |
| F (F-39) / 20 | Reserved |
| F (F-40) / 20 | Reserved |
| F (F-41) / 20 | Additionally |
| F (F-42) / 20 | Additionally, a stove heater block |
| F (F-43) / 20 | Additionally, a stove heater block |
| F (F-44) / 20 | Additionally, a stove heater block |
| F (F-45) / 20 | Additionally, a stove heater block |
| F (F-46) / 20 | Additionally, a stove heater block |
| F (F-47) / 20 | Backlight |
| F (F-48) / 20 | Interior lighting |
| F (F-49) / 20 | Windshield washer relay |
| F (F-50) / 20 | Reservation |
| F (F-51) / 20 | Reservation |
| F (F-52) / 20 | Electronic powertrain control unit |
| F (F-53) / 20 | Reservation |
| F (F-54) / 20 | Reservation |
| F (F-55) / 20 | Reservation |
| F (F-56) / 20 | Stop signals |
| F (F-57) / 20 | Headlight |
| F (F-58) / 20 | Throttle valve |
| F (F-59) / 20 | Window lifters |
| F (F-60) / 20 | Rear fog lights |
| F (F-61) / 20 | Ignition |
| F (F-62) / 20 | Fuel equipment |
| F (F-63) / 20 | Electrical equipment |
| F (F-64) / 20 | Reservation |
| F (F-65) / 20 | Contact plate for rear lights, brake lights |
| F (F-66) / 20 | Digital sensor block |
Symptoms of a problem
- Sparks shooting between the modules due to weak contact, burning out of the melting element;
- The smell of melted plastic is heard at the installation site of the mounting block;
- On the dashboard there is an LED indicator indicating a malfunction of equipment in the engine compartment or inside the car;
- When voltage is applied and the equipment is activated, the units are inactive.
Causes of failure
- Failure to comply with the deadlines for vehicle diagnostics and preventive maintenance;
- Installation of non-original parts, poor workmanship;
- Violation of installation technology;
- Damage to the mounting block;
- Short circuit in the electrical circuit;
- Damage to the power cable, open circuit;
- Weakening, oxidation of contacts.
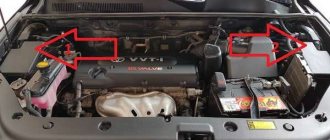
Block under the hood
The main block with fuses and relays is located under the hood on the left side.
Option 1
Photo - example
Scheme from the block cover
Designation
- CHARGE 7.5A - battery charging system, charging current indicator light, automatic starting
- FAN-I/UP 7.5A - engine warm-up system before starting, automatic starting
- HORN - signal relay
- HEAD - headlight relay
- DOME 10A - ceiling lamp, door indicator lamps, rear door lamp
- EFI 15A - electronic gasoline injection system
- HAZ-HORN 15A - warning flashing signals, sound signal
- FAN 30A - engine cooling system, fan
- FAN NO.1 - cooling fan relay.
Option 2
Cover diagram
Scheme
Purpose
| A | 30A AM2 - circuit AM2 of the ignition switch (terminals IG2, ST2) |
| b | 30A FAN - radiator fan |
| With | 40A AM1 - output circuit AM1 of the ignition switch (terminals ACC, IG1, ST1), 80A GLOW (diesel) - spark plugs |
| d | 80/100A ALT (gasoline) - battery charging, AM1 (diesel), AM1 (2E) |
| e | 50A ABS - ABS |
| 1 | 20A DOME - electric drive and interior lighting |
| 2 | 20A HA7-HORN - alarm, sound signal |
| 3 | 7.5A FAN-I/UP - increase idle speed |
| 4 | 7.5A ALT-S - charging |
| 5 | 7.5A Spare |
| 6 | 15A Spare - spare |
| 7 | 20A Spare - spare |
| 8 | 15A HEAD (RH) - right headlights |
| 9 | 15A HEAD (LH) - left headlights |
| 10 | 15A EFI F-HTR - fuel supply |
| A | HORN - Signal relay |
| B | FAN - Cooling fan relay |
| WITH | E/G-MAIN — Main relay |
| D | HEAD - Headlight relay |
| E | EFI - Engine Relay |
Toyota Sprinter fuses and relays
The Toyota Sprinter
was produced in various body styles, such as the Toyota Sprinter Trueno (three-door coupe), Toyota Sprinter Cielo five-door liftback), Toyota
Sprinter Carib (station wagon), Toyota Sprinter Marino (five-door hardtop) and others. Also known as Geo Prizm or Chevrolet Prizm. In this article we will show a description of fuses and relays Toyota Sprinter 1987, 1988, 1989, 1990, 1991, 1992, 1993, 1994, 1995, 1996, 1997, 1998, 1999, 2000, 2001 with block diagrams and their locations. Let's highlight the cigarette lighter fuse.
The location of the blocks and their purpose may differ from those presented and depend on the year of manufacture, level of equipment and region of delivery of your car. Check the purpose with your diagrams on the block cover.
How to find out about a breakdown
The main purpose of Toyota Corolla fuses is to protect the circuit on which they are installed and for which they are responsible, including the cigarette lighter. Each fuse that is included in the block has a special designation on its panel indicating this circuit. Thus, the location of information on it helps during repairs.
The Toyota Corolla block consists of three types of miniature parts. These small-sized fuses have contacts made in the form of plates in their design. They are easily removed and can be replaced with new ones without the use of additional equipment. All work is done on Toyota Corolla manually.
The first thing you need to pay attention to when a unit or one of the elements of the electrical equipment of a Toyota Corolla stops functioning normally is the fuse. It is its breakdown that often causes a car malfunction.
To find out what condition the Toyota Corolla block is in, just look closely at the connecting wire on the part. This can be done directly through the plastic case, which is transparent. Sometimes it is worth paying attention to the integrity of the case itself.
- There are three types of fuses:
- Each of them looks different, and fuse failures are characterized differently.
- Details of the first type can be seen in more detail in the following picture.
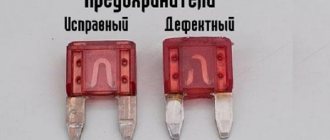
- Here you can clearly see that the Toyota Corolla fuse on the left is intact, and the fuse on the right is blown.
The second type looks different; you can examine its integrity not from the side, but from above. The picture shows which fuse is intact and which is not.
Type C products burn out internally. The picture shows how this happens.
Part replacement
If you need to replace a fuse, be sure to use a new one with the same power as the old one.
Of course, physically and of different power can be interchanged, but you should only use a fuse of the corresponding technical specifications of the King.
Professionals do not recommend replacing a cigarette lighter part with one with less or more power; each individual electrical circuit in the car must have appropriate protection.
It is not always convenient to make repairs with your fingers; professionals often use special tweezers, which allow you to quickly and effortlessly remove the fuse from the socket.
To replace it you need to turn off all electricity in the Toyota Corolla.
Installing fuses with a higher rated current for the cigarette lighter, as well as using homemade jumpers, can cause a fire or major damage.
How to find out power
The power of the part is not difficult to find out. Each fuse has a label with its rating. If a new part in your car immediately burns out, find out the reason before replacing it again. This may have occurred as a result of a short circuit, which was caused by damage to the electrical wire, and, accordingly, to the electrical appliances of the car, including the cigarette lighter.
Toyota Carib 1992, engine Gasoline 1.6 liter., 83 hp, AWD drive, Manual - DIY
Comments 9
thermal fuse. found, read round
I had this happen, it seems very similar, at one point everything stopped working (and the signaling system also failed, and there wasn’t a single cylinder for the key:(( ). It turned out to be a fuse, I won’t say exactly which side, the driver’s or even the other, it’s not like an ordinary one, but healthy, almost like a relay, there’s a plate with a bolt (twisting it fixed everything) the thing turned out to be that while cleaning the entire block of driver’s buttons, I messed up and there was a short circuit, and this fuse is designed like this - the plate When heated, it bends and there is no contact. The fuse is somewhere in the manual. Before that, I looked at everything I could (( eliminated
Actually, I blame him too. Before your comment, I had time to read the manual and there I also saw that the relays are located somewhere under the steering wheel. And sometimes some kind of switch starts “ticking” there, about once every two seconds. I'll try to get there
I had this happen, it seems very similar, at one point everything stopped working (and the signaling system also failed, and there wasn’t a single cylinder for the key:(( ). It turned out to be a fuse, I won’t say exactly which side, the driver’s or even the other, it’s not like an ordinary one, but healthy, almost like a relay, there’s a plate with a bolt (twisting it fixed everything) the thing turned out to be that while cleaning the entire block of driver’s buttons, I messed up and there was a short circuit, and this fuse is designed like this - the plate When heated, it bends and there is no contact. The fuse is somewhere in the manual. Before that, I looked at everything I could (( eliminated
There was a similar malfunction with the window lifters, a thermal relay of the same type... all the window lifters did not work...
I removed the harnesses on my caribas and soldered new wiring because... standard wires break and especially when the insulation is even slightly damaged, the copper rots inside the insulation and because of this it is not clear that there is a break here
I support it, just burn it. Unwind the electrical tape and look for a broken wire somewhere.
Try opening the door slightly and pressing the buttons while touching the scythe in the driver's door... I found out at one time that the problem was in it when the left window showed off the front
I touched the tourniquet, no reaction. Perhaps I did not accurately describe the problem... there is no response to the buttons not only in the driver's door but also in all the others.
Non-working wipers, cigarette lighter failure, dimmed headlights on a Toyota Corolla, all this is the result of blown fuses. In this case, there is no way to do without replacement, but not always independent intervention in such a complex mechanism as a car’s electrics can save money; sometimes everything happens quite the opposite.
The electrical circuit of the Toyota Corolla is protected by several fuses, fused jumpers and switches that operate in automatic mode. The central unit is located directly under the dashboard, on the driver's side of the Toyota Corolla, on the wall. It is covered by a decorative panel, which can be easily removed if necessary.
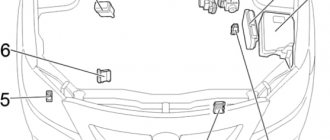
The location of the second block is the compartment where the Toyota Corolla engine components are located.
In models with air conditioning, the location is different; here the unit is installed next to the battery.
Location of fuse and relay blocks, drawing from the manual

